Imagine holding a faded 1920s photograph of your great-grandfather, only to watch him suddenly blink, smile, and wave directly at you. This isn’t science fiction, nor is it the result of an expensive Hollywood studio team working for weeks to manually animate a picture. According to digital archivists, we are entering an era where historical memories no longer have to remain frozen. We can now experience the emotional impact of breathing actual life into static moments. The Interesting Info about ai image to video no restrictions.
Have you ever looked at a cherished family portrait and wished you could see what happened just one second later? Traditional photography leaves our most precious subjects stuck in time, requiring us to fill in the blanks with our imagination. Today, AI image-to-video generation changes that fundamental dynamic, offering a bridge between a silent snapshot and a living, moving memory. You may Explore uncensoredai.video.
To understand this shift, picture a digital flipbook rather than a traditional movie camera. The software isn’t actually “filming” anything new; instead, it relies on a process called generative prediction. In practice, this means the AI analyzes your starting picture and logically guesses what the next twenty-four frames would look like if the subject started walking or talking. It looks at the static clues in your photo and predicts the natural movement that should follow.
Of course, guessing what comes next is only half the battle. The real secret to making these clips look believable is temporal consistency, which acts as the AI’s visual memory. As the digital flipbook pages turn, the computer has to remember exactly what your great-grandfather’s nose or hat looked like in the first frame so it doesn’t accidentally change his face in the third frame. Keeping that identity locked in place from second to second is what prevents the video from turning into a melting, unrecognizable mess.
You might assume this process requires a degree in computer science, but learning how to turn photos into cinematic videos using AI actually comes down to three basic choices. First, you provide the foundational image, acting as your starting puppet. Next, you write a short text prompt to give the AI its strings, telling it whether to make the subject smile or the background waves crash. Finally, you adjust a “motion weight” dial, which simply tells the system how wildly or gently to move those strings.
While current tools generally create short clips lasting only three to five seconds, those few moments are often enough to tell a incredibly powerful story. Generative video models for creative beginners are designed to be forgiving, allowing you to experiment without any fear of making a mistake. By mastering these simple concepts, you are ready to step into the director’s chair and bring your own static images to life.
The Digital Flipbook: How AI Guesses the ‘Future’ of Your Photos
Because we already know that artificial intelligence can predict and generate static artwork based on vast amounts of training data, making a static photo move might seem like magic. In reality, an ai image to video tool acts more like an incredibly fast, highly educated sketch artist creating a digital flipbook. A video is simply a rapid sequence of still pictures, and the AI’s job is to guess what the very next picture should look like if the subject started moving.
To make that movement smooth, the system relies on a technique called “Frame Interpolation.” Imagine drawing a stick figure on page one of a notebook and another on page three; interpolation is the process of guessing exactly what belongs on page two so the jump isn’t jarring. The AI figures this out using “Motion Vectors,” which you can think of as invisible arrows pointing out the direction and speed a specific pixel needs to travel. If you ask for a video of a dog running, those invisible arrows tell the AI exactly where to shift the dog’s legs in the next frame.
But moving a flat image creates a massive challenge: what happens when the subject turns around? If your original photo only shows the front of someone’s face, the AI must use “Visual Memory” to invent the back of their head based on what it learned from millions of other photos. Keeping the character looking like the exact same person from start to finish is known as maintaining temporal consistency. Without this crucial skill, a person’s hair might randomly change color or their jacket could melt into the background as they walk across the screen.
When you upload your picture to an image to video platform, the AI follows a specific logical path to bring it to life:
- Scene Analysis: It identifies the main subject, the background, and the lighting in your original picture.
- Direction Mapping: It creates those invisible motion vectors based on your text prompt (like “waves crashing” or “woman walking”).
- Gap Filling: It uses frame interpolation to draw the dozens of missing pictures between the start of the movement and the end.
- Consistency Check: It applies visual memory to ensure the newly revealed angles naturally match the original subject.
This step-by-step guessing game reveals why certain scenes are much easier to animate than others. Natural elements like flowing water or drifting clouds are forgiving because they lack strict structural rules, whereas a person turning their body requires perfect spatial logic to avoid looking distorted. Now that you know how the digital flipbook works behind the scenes, you are ready to choose the right software to direct your own moving masterpiece.
Runway Gen-2 vs. Stable Video Diffusion: Choosing the Right Engine for Your Style
Stepping into the world of AI video creation feels a bit like buying a new car: you have to decide if you want an automatic transmission or a manual one. Now that you understand how the digital flipbook works behind the scenes, the next step is choosing the software that will actually draw it for you. The two biggest names in this space right now offer completely different experiences. One operates via cloud-based generation—meaning you use a website to briefly rent out their massive supercomputers—while the other lets you download the software to run entirely on your own machine.
For those who want instant gratification, Runway Gen-2 is the sleek, automatic option. As a commercial ai video generator, it is designed to be as user-friendly as a standard social media app. You simply upload your family vacation photo, type a quick instruction like “make the clouds roll,” and the software handles the rest on their servers. Because you are paying for a subscription to use their cloud computers, the interface is highly polished, and the results naturally favor stunning photorealism. It is the perfect choice if you want to avoid the frustration of learning complex software just to make a quick video for your small business.
On the other hand, DIY enthusiasts often prefer the manual control of Stable Video Diffusion. This is an open-source model, which means its underlying code is like a public recipe that anyone can download, use, and modify for free. When you use an open-source tool, you actually download the AI’s model weights—you can think of these as the “muscle memory” or “instincts” the AI developed after studying millions of videos. Because you own this recipe, you can tweak these instincts to produce highly stylized, artistic animations rather than just sticking to strict reality.
To help you settle the Stable Video Diffusion vs Runway Gen-2 debate, here is a quick breakdown of how they compare for everyday use:
- Accessibility: Runway is a simple website that works smoothly on any basic laptop; Stable Video Diffusion requires a powerful home computer or a technical setup to run locally.
- Motion Control: Stable Video Diffusion offers complex sliders and settings for tweaking exact movement patterns, while Runway relies on intuitive, beginner-friendly preset tools.
- Cost: Runway charges a monthly subscription fee for their computing power, whereas Stable Video Diffusion is entirely free to download and use forever.
Ultimately, finding the best tools for realistic motion animation depends entirely on your patience and your hardware. If you have an older laptop and ten dollars to spare, a cloud app is your best friend. If you have a powerful gaming computer and want total control over every pixel without spending a dime, open-source is the way to go. Either way, once you pick your platform, you will want to know how to direct the action perfectly.
Mastering the ‘Motion Brush’: How to Paint Life into Specific Parts of Your Image
When an AI tries to animate an entire picture at once, the results can sometimes look chaotic or dizzying. By choosing to move only one specific element—like a crackling campfire or steam rising from a coffee cup—you create a beautiful “cinematic” contrast between the frozen background and the living subject. This subtle trick instantly upgrades your clip from a random AI experiment to professional-looking b-roll that can captivate any audience.
Think of yourself as a “Puppet Master” rather than just a passive observer. Instead of letting the computer guess what should move, modern platforms let you dictate the action using a feature called masking. In simple terms, masking means drawing a digital boundary over the specific parts of the image you want the AI to focus on. By utilizing motion brush techniques for selective image animation, you literally paint over the subject with your mouse, telling the system to only apply its magic to that highlighted area.
Putting this into practice is surprisingly straightforward. If you want to animate a roaring waterfall while ensuring the surrounding pine trees remain perfectly still, you would follow this simple workflow:
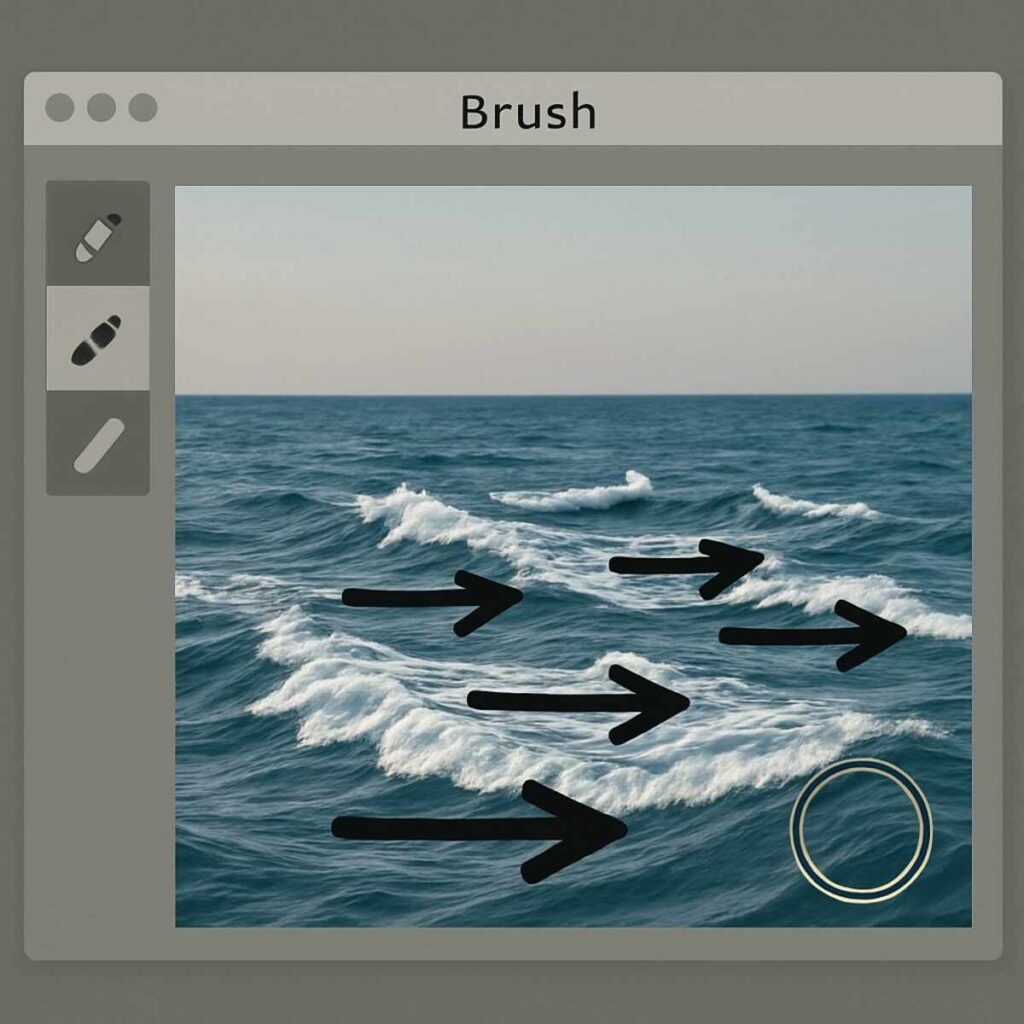
- Paint the Target: Select the motion brush tool and color over only the falling water, making sure to leave the trees and rocks untouched.
- Set the Direction: Use the tool’s directional arrows to tell the AI that the water should flow downward, preventing it from guessing the wrong way.
- Generate the Clip: Hit the create button to watch the AI seamlessly blend your static forest with a beautifully flowing cascade.
Beware the temptation to push the action too far on your first try. When controlling motion intensity in AI video generators, a heavy hand can quickly ruin a great shot. Motion intensity is a slider that dictates how aggressively the AI changes the pixels from one frame to the next. If you crank this setting to the maximum, the AI struggles to remember what the original object looked like, resulting in warped, melting, or rubbery movements. Keeping the intensity low ensures a natural, realistic flow that tricks the eye perfectly.
Mastering these delicate brushstrokes gives you the power to bring any still photograph to life with remarkable precision and zero distortion. Now that you know how to command subtle, localized movement for everyday scenes, you might be wondering how to handle bigger, bolder ideas.
Pika Labs and Luma Dream Machine: Creating High-Action Cinematic Clips
Just as human film directors have unique styles, video AIs possess distinct “personalities” suited for entirely different tasks. When looking at a Pika Labs vs Luma Dream Machine comparison, the creative division of labor becomes incredibly clear. Pika Labs shines when you want vibrant, stylized character animation that feels like a modern cartoon or a beautifully illustrated comic book. Conversely, Luma Dream Machine is your go-to director for gritty, high-fidelity realism, making it the perfect choice for bringing raw, lifelike detail to everyday footage.
Stepping into the director’s chair requires understanding how these specific platforms view your images. Instead of treating your upload as a flat, two-dimensional canvas, these advanced tools use 3D Spatial Awareness to imagine the actual depth of your scene. Because of this, small business owners frequently ask, “can I convert product photos into 3D videos?” The answer is a resounding yes. You can type prompts asking the digital camera to “orbit” a subject or “zoom” through a room, and the AI relies on its visual memory to accurately guess what the side or back of your product looks like as the camera swoops around it.
Making the camera move is only half the magic; the subjects inside the frame must also obey the basic rules of reality. To achieve this, these platforms utilize Physics Simulation, allowing the AI to naturally predict how gravity and momentum should affect different materials. For example, if you are creating cinematic b-roll from static landscape photography, the system knows that heavy boulders should stay firmly planted while lightweight pine needles scatter in the wind. You do not need to explain gravity to the software, because it intuitively understands how objects are supposed to behave in the real world.
The ultimate test of this digital reality occurs when those moving elements overlap in the frame. Imagine a person walking behind a thick oak tree and seamlessly emerging on the other side. This concept is called Occlusion, and it used to be a massive hurdle for artificial intelligence. Rather than letting the walking person bizarrely melt into the tree trunk, modern AI acts like a brilliant puppeteer. It temporarily hides the subject from view and redraws them flawlessly as they step back into the light, perfectly preserving the illusion of real physical space.
Armed with a foundational grasp of virtual camera movements, real-world physics, and overlapping objects, your creative possibilities expand exponentially. You are no longer just wiggling a static photo; you are orchestrating a living, breathing, three-dimensional world where objects interact naturally. While typing text prompts sets a beautiful stage for these high-action scenes, true professionals know how to manually guide the exact timing of that action.
The ‘Director’s Cut’ Strategy: Using Keyframes to Control the Story
While letting the computer freely imagine movement is a fun experiment, true storytelling requires specific intention. Moving beyond random, unpredictable motion means taking the reins away from the machine. You are no longer just rolling the dice; you are actively commanding where the story goes next.
Think of this level of control like drawing a treasure map for the software. Instead of just giving the AI a single starting picture, you provide specific “Keyframes”—which act as strict starting and ending pictures—to anchor the scene. By adding “Waypoints” in the middle, you create visual stepping stones for the software to follow. This structured approach is the absolute secret to transforming digital art with generative video technology into a deliberate, emotional narrative.
Providing these visual anchors introduces a concept called Trajectory Control. Rather than letting the AI wander off script and accidentally make a walking dog suddenly sprout wings, you are forcing it to follow a set path. This manual guidance dramatically reduces the frustration of endless “re-rolls,” where you have to generate a video dozens of times just to get one usable clip. When you define the exact journey from point A to point B, the AI simply connects the dots smoothly.
Ready to sit in the director’s chair and take command of your scenes? Follow this step-by-step guide to keyframing for AI animation to guarantee your vision comes to life on the screen:
- Step 1: Select your opening image (your first keyframe) to firmly establish the beginning of your scene.
- Step 2: Upload a final image (your ending keyframe) to tell the AI exactly how the video must finish.
- Step 3: Drop in one or two waypoints (middle images) if your subject needs to change direction mid-scene.
- Step 4: Add your text prompt to gently describe the physical motion happening between those visual markers.
- Step 5: Generate the clip and watch the software smoothly connect your exact story beats without wandering off-topic.
Mastering this connect-the-dots method ensures your subjects move exactly where you want them, every single time. However, even the most carefully planned sequences can sometimes suffer from sudden visual hiccups as the software tries to blend those keyframes together.
Fixing the ‘Flicker’: Practical Tips for Reducing Glitches and Artifacts
Even the most beautifully planned video can suddenly turn bizarre. You might be watching a gorgeous landscape when, out of nowhere, a tree melts into the sky or a person’s face shifts like hot wax. These strange, unwanted glitches are called “Artifacts.” They happen because the AI is constantly guessing what comes next in its digital flipbook, and sometimes it simply guesses wrong.
Taming this visual chaos requires a secret weapon known as a “Seed Number.” Think of a seed as the digital DNA or an exact recipe for your specific video clip. When you lock in a specific seed number, you force the AI to use the exact same stylistic foundation for every single frame, fixing temporal consistency issues in generative clips. It acts like a visual memory, keeping a character’s jacket looking identical from one second to the next.
Knowing how to spot and correct these mistakes will save you hours of frustration. Here is a quick guide to reducing flickering and artifacts in AI video loops:
- Morphing Limbs: If arms or legs melt together, simplify your text instructions so the AI has less complex movement to calculate.
- The “Six-Finger” Problem: Refine the source image first; if your starting photo has blurry hands, the video will only amplify the mistake.
- Flickering Backgrounds: Match your frame rates carefully so the software does not have to invent missing background pieces too quickly.
- Floating Objects: Give the item a clear surface to rest on in your instructions, anchoring the object in reality.
Another powerful trick for cleaning up your clips is using “Negative Prompting.” Instead of just telling the AI what you want to see, this feature lets you explicitly state what you do not want. Imagine being a movie director handing your crew a banned list. By typing words like “blurry,” “extra fingers,” or “melting” into the negative prompt box, you build strict guardrails that keep the software from making common artistic errors.
Sometimes, however, a generated clip is simply unsalvageable. Part of your job as a curator is recognizing when to abandon a completely warped video versus when a minor text tweak might fix a small glitch. Clearing away these visual bugs prepares you to give the software better acting directions.
Prompt Engineering for Movement: Talking to the ‘Puppet Master’
Stepping into the director’s chair means learning how to communicate your vision to the software. You wouldn’t just tell a human actor to “move”; you would tell them exactly how to move. The same rule applies here. Mastering prompt engineering for realistic character movement involves treating the AI like a literal-minded puppet master. If you give vague instructions, you get unpredictable results. To get exactly what you want, you need to speak the language of cinematography.
The first step in taking control is understanding the difference between moving the subject and moving the viewer. “Subject motion” happens when the people or objects inside the frame are active—like a dog wagging its tail or a woman sipping coffee. “Camera motion,” on the other hand, dictates how the digital lens itself glides through the scene. A static subject can still feel incredibly dynamic if the camera is sweeping around them in a cinematic circle.
Crafting the perfect instruction requires a simple structure known as the “Golden Formula.” Think of it as: Subject + Action + Camera + Speed. Instead of typing “a man running,” you would write, “A marathon runner (Subject) sprinting heavily (Action), tracking shot from the side (Camera), slow motion (Speed).” When combined with the best tools for realistic motion animation, this four-part recipe gives the AI enough context to generate smooth, purposeful movements rather than chaotic guesswork.
Building your vocabulary of camera directions will instantly elevate your clips from amateur to cinematic. Here is a quick cheat sheet of common motion verbs and their visual impact:
- Pan: Sweeps the camera side-to-side, perfect for revealing a wide landscape.
- Tilt: Points the lens up or down, great for looking up at a tall building.
- Zoom: Pulls the viewer closer to or further from the subject without moving the camera.
- Dolly: Physically moves the virtual camera forward or backward through the space, creating a 3D feeling.
- Orbit: Rotates in a smooth circle around the subject, creating high-energy drama.
Even with the perfect words, you might need to adjust the overall energy of the scene using “Motion Parameters.” These are simple number settings—essentially an intensity dial—that tell the AI whether you want subtle breathing or an explosive sprint. Setting the parameter too high often leads to those melting artifacts we discussed earlier, while setting it too low leaves your video looking like a frozen photograph. Once you find that sweet spot of prompt and motion intensity, you unlock incredible creative potential.
Turning Portraits into Dynamic Social Media Content
In today’s crowded digital space, everyone is searching for “scroll-stoppers”—visual moments so captivating that viewers physically pause their thumbs. Using ai image to video technology is the easiest way to create this effect without hiring a film crew. By transforming a flat picture into a living clip, you instantly signal to your audience that your post is worth their time and attention.
When bringing personal headshots to life, the secret to success is the “Subtle Motion” rule, which simply dictates that less is almost always more. Instead of trying to make your subject walk or jump, you want to focus on “micro-interactions.” These are tiny, natural movements like a gentle blink, a slight smile, or wind blowing through someone’s hair. This restrained approach keeps the portrait looking professional while giving it that magical “living photo” feel that deeply connects with viewers.
Enhancing social media content with dynamic AI portraits isn’t just for personal profiles; it is incredibly powerful for small business marketing, too. Imagine taking a beautifully lit, but completely static, photo of a coffee cup or a handmade candle. With a quick prompt, you can add curling steam or a flickering flame, turning that basic product shot into a high-converting video ad in under sixty seconds. It completely removes the barrier between a modest budget and premium-looking advertising.
Your newfound ability to hold attention with these gentle, realistic movements will completely transform your digital presence. Once you master the art of whispering instructions to the AI for subtle portrait animations, you are ready to tackle much larger, more dramatic canvases.
From Static Hobbies to Moving Art: Animating Landscapes and Digital Paintings
We’ve seen how a subtle blink can bring a portrait to life, but what happens when you apply that same magic to a sprawling landscape? By transforming digital art with generative video technology, you can take a completely still nature photo or digital painting and introduce “Environmental Simulation.” This simply means asking the AI to add natural, moving weather patterns to your image. You can take a bright, static picture of a mountain and tell the AI to add rolling fog, falling snow, or dramatic thunderclouds. Suddenly, you aren’t just looking at a flat picture; you are experiencing the mood of a living, breathing world.
Creating that sense of a living world often requires more than just moving water or clouds; it requires depth. This brings us to the “Parallax Effect,” a visual trick you already know from real life. Imagine riding in a passenger car: the fences near the road zip by quickly, while the mountains in the distance barely seem to move at all. AI tools can recreate this by separating your flat image into invisible foreground, middle, and background layers. As the digital camera pushes forward, these layers shift at different speeds, creating cinematic b-roll from static landscape photography that feels genuinely three-dimensional.
Turning your favorite piece into a looping gallery background—a continuous video that seamlessly replays on a screen—works beautifully across several different mediums. While standard photography is popular, the AI’s logic is incredibly adaptable to drawn or painted textures. If you want to experiment, try animating these four artistic styles:
- Digital Matte Paintings: Perfect for sweeping, science-fiction cities with glowing, moving lights.
- Oil on Canvas: Creates a mesmerizing effect as thick, textured brushstrokes gently shift.
- Watercolor Landscapes: Excellent for simulating bleeding colors and smoothly flowing rivers.
- Vintage Travel Posters: Brings flat, retro illustrations to life with slow-moving skies.
Mastering these environmental effects allows you to turn passive hobbies into captivating, moving art that draws viewers deeply into the frame.
Your Action Plan for First-Time AI Directors: From Upload to Export
You no longer have to look at a beautiful photograph and wonder what happened in the seconds immediately after the shutter clicked. By stepping into the director’s chair, you have learned to guide these digital flipbooks, providing the invisible strings for the AI to animate your favorite still moments. You now understand the basic logic of visual memory and motion prompts well enough to transform static pixels into living, breathing scenes.
As you step into this new creative playground, remember to pace yourself to avoid beginner burnout. Current tools thrive on short bursts of motion—typically three to five seconds—so focus on capturing a single beautiful movement rather than directing a full-length feature film. By mastering these short clips now, you are effectively preparing for the future of AI video by building a library of animated assets today, perfectly positioned for when the technology inevitably expands.
To build your confidence without feeling overwhelmed, rely on this ‘Daily Practice’ checklist for mastering AI video in 15 minutes a day:
- Start simple: Pick one clear, uncluttered image featuring a single subject.
- Write basic motion: Use a simple, two-word prompt like “gentle wind” or “slow smile.”
- Embrace the short clip: Generate your three-second video and focus on the subtle movement.
- Analyze the result: Notice what the AI remembered perfectly and where it guessed wrong.
- Tweak one variable: Change either the image or the prompt on your next try, but never both at once.
Following this consistent, five-step workflow makes navigating generative video models for creative beginners an intuitive, enjoyable process rather than a frustrating guessing game. Each time you run a quick test, you refine your ability to communicate with the system, discovering exactly how to turn photos into cinematic videos using AI. While others might struggle by asking the software to do too much at once, you now possess a focused strategy that practically guarantees steady, successful progress.
We are witnessing the birth of ‘The New Magic,’ a fascinating era where the strict boundaries between a frozen memory and a moving story completely dissolve. Try putting this magic to use: find one old family photo—perhaps a faded portrait of a grandparent—upload it to your chosen tool, and ask the AI to add a soft blink or a gentle smile. Once you see a cherished piece of your own history suddenly look back at you, you will never look at a photograph the exact same way again.